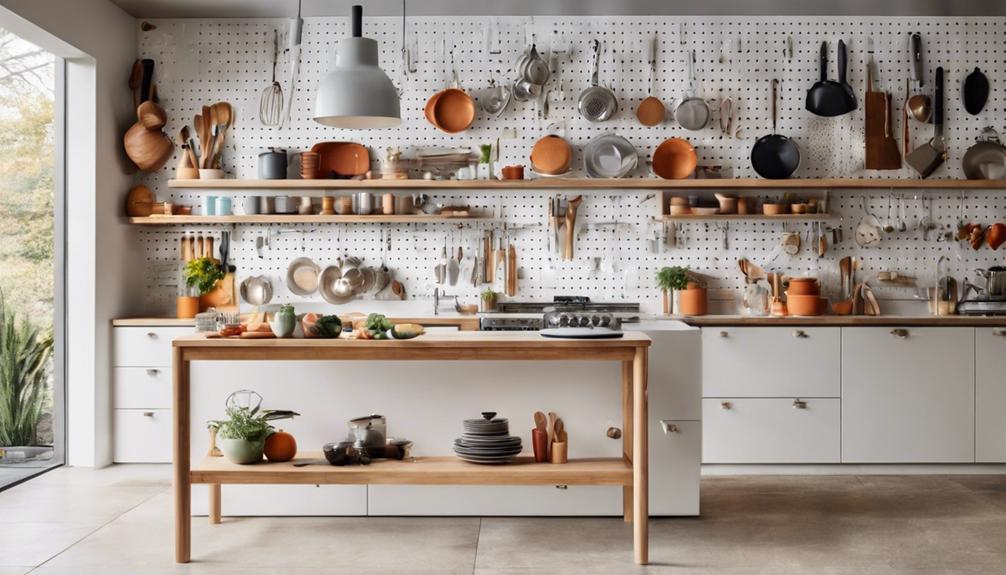
We reorganize our kitchens to maximize efficiency when we rethink how we use our space, prioritize what we truly need, and create systems that simplify our workflow. First, we purge and declutter our countertops, sorting items into keep, donate, and discard piles. We then optimize our storage spaces, categorizing items by frequency of use and storing frequently used ones at eye-level. By creating a functional work triangle, assigning homes for items, and utilizing vertical storage solutions, we're already on our way to a more efficient kitchen – and that's just the beginning of our journey to culinary bliss.
Purge and Declutter Your Space
Let's tackle the challenging task of purging and decluttering our kitchen space, starting with a thorough removal of everything from the countertops and sorting items into three piles: keep, donate/sell, and discard. We're not just decluttering, we're creating a space that sparks joy and makes cooking a breeze.
As we sort, we'll be ruthless about what stays and what goes. Be honest, when was the last time we used that rice cooker or those novelty cookie jars? If it's broken, outdated, or simply doesn't bring us joy, it's time to let it go. We'll set aside items that are still in good condition but no longer needed, and either donate or sell them to make some extra cash.
Now, let's talk about the "keep" pile. This is where we'll store our most-used items, like our trusty chef's knife and favorite cooking utensils. We'll also keep items that bring us joy, like grandma's antique mixing bowl or that quirky kitchen gadget we just can't live without. As we put back only what we need or love, our countertops will transform into a peaceful, organized oasis.
With our space decluttered, we can finally focus on what really matters – cooking up a storm and sharing meals with the people we love. By letting go of the unnecessary, we're making room for what truly adds value to our lives. So, let's get purging and create a kitchen that feels like home!
Optimize Your Cabinets and Shelves
With our countertops cleared of clutter, we're now ready to tackle the often-daunting task of organizing our cabinets and shelves, where a strategic system will help us make the most of our kitchen's vertical space.
To maximize our cabinet space, we'll focus on categorizing items into three groups: frequently used, occasionally used, and rarely used. This will help us prioritize what we need easy access to and what can be stored out of the way.
Here's a rough guide to get us started:
| Category | Storage Location |
|---|---|
| Frequently Used | Eye-level shelves and cabinets |
| Occasionally Used | Upper or lower cabinets |
| Rarely Used | High or hard-to-reach shelves |
By grouping similar items together and assigning them a designated home, we’ll reduce clutter and make meal prep a breeze. For example, we can store all our baking supplies in one cabinet, and our cooking utensils in another. This organization system will also save us time searching for ingredients and tools, allowing us to focus more on creating delicious dishes. Plus, having an orderly kitchen supports nutritious meal planning by making it easier to see what ingredients we have on hand and what we need to restock. With everything in its proper place, cooking becomes a more enjoyable and stress-free experience.
As we organize our cabinets and shelves, we'll also consider the "golden zone" – the area between our waist and shoulder height, where we can easily access items without straining. By keeping our most-used items in this zone, we'll save time and energy in the long run.
Create a Functional Work Triangle
We'll now create a functional work triangle by strategically positioning our sink, stove, and refrigerator to minimize walking distances and maximize our kitchen's workflow efficiency. This important step in organizing our kitchen will greatly reduce the time we spend walking between these essential stations, allowing us to prepare meals faster and with less effort.
To achieve this, we'll focus on positioning these three key elements in a triangular formation, with each point of the triangle being no more than 9 feet apart. This will enable us to move quickly and efficiently between tasks, reducing fatigue and boosting productivity.
Here are some key considerations to keep in mind when creating our functional work triangle:
- Identify the 'hot zones': Determine where we spend most of our time in the kitchen and position the sink, stove, and refrigerator accordingly.
- Consider the 'work zones': Divide the kitchen into zones for food preparation, cooking, and cleaning, and position the work triangle accordingly.
- Leave enough clearance: Make sure there's enough space to move comfortably between each point of the triangle.
- Keep it flexible: Be prepared to adjust the layout as needed to accommodate our unique needs and cooking styles.
- Measure twice, design once: Take precise measurements of our kitchen space and appliances to ensure a functional and efficient work triangle.
Assign a Home for Each Item
As we organize our kitchen for maximum efficiency, we're going to make sure each item has a designated spot. This means assigning a home for every utensil, gadget, and ingredient, making it easy to find what we need when we need it. By doing so, we'll create a sense of order and structure that will simplify our cooking and cleaning routines.
Designate a Station
We designate a station for each item in our kitchen by assigning a specific home for everything, ensuring that every tool, gadget, and ingredient has a predetermined place where it's easily accessible. This way, we can quickly find what we need, saving time and reducing stress.
Here are some examples of designated stations in our kitchen:
- Baking Station: Mixing bowls, measuring cups, and baking sheets are stored near the oven for easy access.
- Coffee Station: Coffee maker, coffee beans, and mugs are grouped together near the countertop.
- Spice Station: Spice rack, oils, and seasonings are organized near the cooking area.
- Pantry Station: Canned goods, pasta, and rice are stored in labeled baskets for easy identification.
- Utensil Station: Frequently used utensils like tongs, spoons, and whisks are hung on a pegboard near the cooking area.
Categorize and Group
By categorizing similar items together and grouping them into zones, we can create a logical flow that streamlines our kitchen workflow. This means assigning a home for each item, making it easy to find what we need when we need it. We start by grouping like items together, such as baking supplies, cooking utensils, and dinnerware. Then, we designate specific zones for each group, like a baking station or a coffee corner. This way, we can access what we need quickly and efficiently, without cluttering our countertops.
We also make sure to store items based on frequency of use. Everyday essentials, like plates and glasses, go in easy-to-reach locations, while less frequently used items, like special occasion dishes, can be stored in harder-to-reach areas. By categorizing and grouping our kitchen items, we create a sense of harmony and flow in our kitchen. We feel more in control and confident, knowing exactly where everything is and how to access it quickly. This sense of belonging and control is key to a more efficient and enjoyable cooking experience.
Utilize Vertical Storage Solutions
To maximize our kitchen's storage capacity, we're installing vertical storage solutions that take advantage of the often-wasted space between countertops and ceiling. This not only keeps our kitchen organized but also adds a touch of sophistication to the overall design. By utilizing wall-mounted shelves, cabinets, and racks, we're creating a more efficient and functional kitchen space.
Here are some ways we're utilizing vertical storage solutions:
- Wall-mounted spice racks: Keeping our spices within easy reach and freeing up cabinet space for other essentials.
- Over-the-counter shelving: Providing additional storage for infrequently used cookbooks, special occasion dishes, or small appliances.
- Magnetic knife strips: Keeping our countertops clear of clutter and our knives within easy reach.
- Fold-down shelves: Creating a temporary workspace for food preparation or additional counter space when needed.
- Ceiling-mounted pot racks: Hanging our pots and pans, keeping them organized and easily accessible.
Designate a Landing Strip
As we work to maximize our kitchen's efficiency, we need a designated spot to place our daily essentials, like keys, wallets, and bags. We're calling this our "landing strip," and it's essential for keeping clutter at bay. By designating a specific area for these items, we'll avoid the chaos that comes with misplacing them.
Daily Essentials Station
We designate a landing strip in our kitchen by allocating a specific area for daily essentials, ensuring that everything we need is within easy reach. This station is our go-to spot for daily necessities, freeing up mental energy for more important things. By designating a specific area for our daily essentials, we can quickly grab what we need without disrupting our workflow.
Here are the essentials we keep in our daily station:
- Coffee and tea supplies
- Frequently used spices and oils
- Fresh fruits and snacks
- Water bottles and glasses
- Recipe books and notes
Key Item Storage
Essential items like kitchen shears, oven mitts, and can openers find a permanent home in our designated landing strip, allowing us to swiftly access them when needed. This intentional storage solution streamlines our workflow, saving us time and energy in the long run. By allocating a specific area for these key items, we avoid clutter and chaos, creating a more harmonious kitchen environment.
We've found that a tray, basket, or container near the kitchen entrance works beautifully as a landing strip. It's the perfect spot to place our daily essentials within easy reach. No more scrambling to find the can opener or oven mitts when we need them most. This thoughtful storage solution also helps us maintain a sense of control and calm, even on the most hectic mornings.
Streamline Your Countertops
By clearing everything off our countertops and sorting items into categories, we can identify what we truly need and use regularly. It's amazing how quickly clutter can accumulate, making our kitchens feel cramped and overwhelming. By taking everything off our countertops, we can take a step back, assess what we really need, and get rid of anything that's no longer serving us.
Here are some common culprits that might be taking up valuable space on our countertops:
- *Appliances we rarely use*
- *Stacks of cookbooks or recipe cards*
- *Kitchen gadgets that promised to make cooking easier but haven't been touched in months*
- *Piles of mail or receipts*
- *A "junk drawer" full of miscellaneous items*
Implement a Maintenance Routine
Now that our countertops are clear, it's time to establish a routine to maintain our newly organized space. We've worked hard to get our kitchen in order, and we don't want it to slip back into chaos. By implementing a maintenance routine, we can guarantee our kitchen stays organized, efficient, and enjoyable to cook in.
Let's start by setting aside 10-15 minutes each day to tidy up. This can be as simple as wiping down the counters, putting away dishes, and making sure everything is in its designated spot. We can also schedule a weekly deep clean to tackle any tougher tasks, like cleaning the oven or refrigerator.
To make maintenance a habit, we can incorporate it into our daily routine. For example, we can tidy up while dinner is cooking or make it a part of our morning routine. We can also assign tasks to family members to make it a team effort.
Frequently Asked Questions
How Do I Maintain Organization After the Initial Setup?
"We're all excited to get our kitchens in order, but let's be real – the real challenge is keeping it that way! To maintain our hard-won organization, we make it a habit to put things back in their assigned spots after each use. We also schedule regular 'kitchen tidy' sessions to tackle any clutter that's crept back in. By doing so, we're able to enjoy our newly organized kitchen for the long haul."
Can a Small Kitchen Still Be Organized for Maximum Efficiency?
Can a small kitchen still be organized for maximum efficiency? We're about to spill the secret: yes, it's absolutely possible! We've seen it time and time again – tiny kitchens that are more functional than their larger counterparts. The key is to get creative with storage, optimize your layout, and prioritize what really matters. With a few clever tweaks, we can turn even the coziest of kitchens into a culinary powerhouse.
What if I Have Limited Budget for Storage Solutions?
We totally get it – budget can be a major constraint! When we're on a tight budget, we need creative storage solutions that won't break the bank. We've found that repurposing items like mason jars, crates, and even cardboard boxes can be super effective. We also love scouring thrift stores and garage sales for affordable storage finds. With a little resourcefulness, we can create a beautifully organized kitchen on a shoestring!
How Often Should I Reassess My Kitchen's Organization?
We regularly review our kitchen's organization – every 3-6 months – to make sure it still works for us. As our cooking habits and needs change, our kitchen setup should too. We take stock of what's working and what's not, and make adjustments accordingly. It's not about perfection; it's about creating a space that supports our evolving lifestyle. By reassessing often, we maintain a kitchen that's functional, efficient, and feels like ours.
Are There Any Specific Organization Strategies for Kitchen "Dead" Zones?
We've all got those pesky "dead" zones in our kitchens, right? Take Sarah's kitchen, for instance – the awkward space between her wall oven and countertop was a total waste. To maximize it, we turned it into a spice rack station using a slide-out drawer and adhesive magnets. Now, it's a functional hub! For similar zones, consider vertical storage, turntables, or retractable shelves to breathe new life into those forgotten areas.